
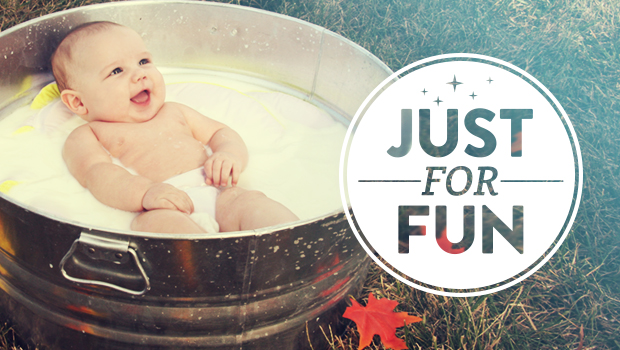
I’ve fallen in love with some beautiful and surreal milk bath photos. Since I am not a photographer, I turned to my photographer friends to help me take some pictures. We tried it out so you don’t have to make the same mistakes we did. Enjoy this step-by-step guide to getting your milk bath photos to turn out great!

Step 1: Choose Your Tub
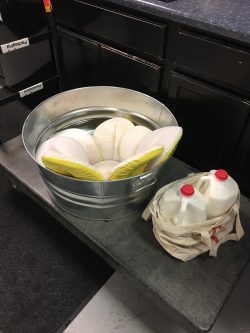
You have lots of options: steel tub, porcelain, bathtub, vintage tub, fancy sink, random item you can fill with liquid.
I chose to repurpose a steel tub I had that may or may not have been used as a cooler at our last family gathering.
Step 2: Accessories
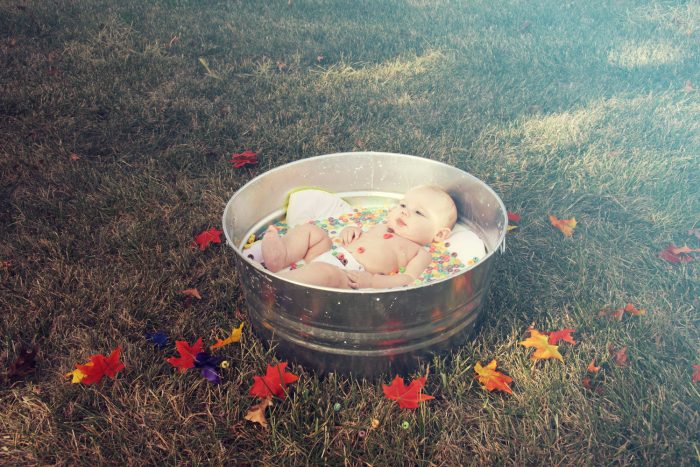
You can use silk flowers, real flowers or leaves. You can even use cereal! Are you looking for a brightly colored background or do you want more subdued colors so the focus is all on the baby? It’s up to you.
Tip: The silk flowers and leaves we used sank and the colors started to bleed into the milk. Test yours in water before adding to milk.
Step 3: Baby Accessories
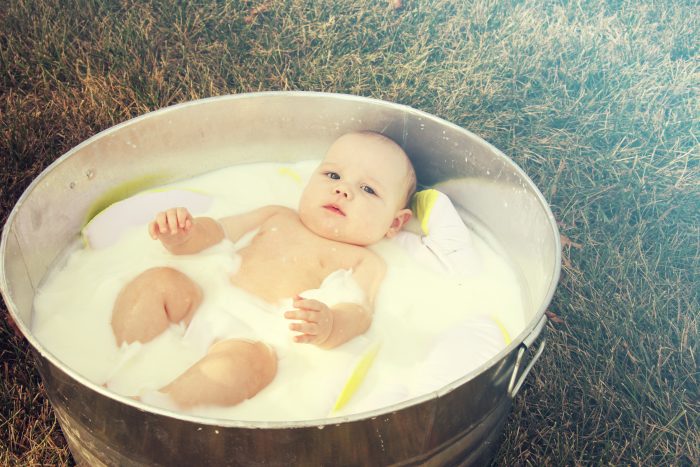
For my baby’s modesty and to protect the milk from incidents, he is wearing a white bumGenius diaper. It blends into the milk! A washcloth would work, too, but I was worried he might feel the need to relieve himself and we’d have to dump all the milk and start over.
Also, because the tub isn’t the most comfortable thing in the world, I’ve positioned a Blooming Bath underneath him. It’s machine washable, so no need to worry. Mine came out just fine. You could also use a towel. I think adding a pool noodle would have helped even more to keep him in position.

Dry run
Tip: Turn the Blooming Bath upside down so the white side is facing up. If you are using a sponge bathtub, place a white towel over it.
Step 4: Preparing the Milk Bath
Preparing the bath
Fill the tub with bath temperature water. It can be slightly warmer as the milk will cool it down.
Here, we’ve added 2 gallons of whole milk. To make it a bit cloudier, we’re adding powdered milk.
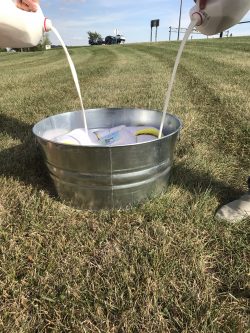
Pour it in
Tip: I’d actually skip the powdered milk. It was kind of gross and didn’t make the milk much more opaque.
Step 5: Lighting
We decided to use natural light. We chose to shoot in the late afternoon out of the direct sun. While natural light at sunrise or sunset creates beautiful photos, that can be tricky if you’re choosing to shoot in your bathtub. Try to get a good amount of light without making it too harsh.
Step 6: Posing
This is where things kind of fell apart. Our baby model was just shy of 6 months old. He could sit, but not reliably, so we were laying him in the tub. The problem is a squirmy baby covered in milk may give mama a slight heart attack. Here, so you can visibly see the tension in my hands. I was so scared he was going to slip under or get a face full of milk.
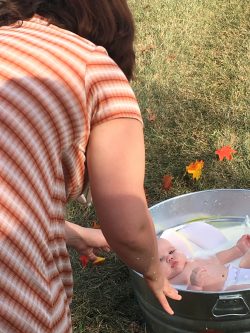
Mom was pretty nervous
The next challenge was repositioning baby between takes. I’d suggest testing out positioning in water before adding the milk. This is, in fact, real milk. Which is kind of gross. It’s not like picking the baby up out of a nice bubble bath. You’re going to get lots of milk on you. Ick! Double ick if it’s kind of warm outside and you start smelling like spoiled milk.
Tip: Have extra towels on hand! It’s also nice to dab milk off baby’s face if they are a splasher.
We had 3 adults working on this shoot.
1- Mommy who was in charge of safety and keeping the model happy.
2- Danny who helped with props, dumping out excess milk and calming down mama.
3-Taylor who took the photos. Since she was in charge of the camera, she couldn’t really help with positioning or props because we didn’t want to get the camera milky.
Just know this is not something you should take on by yourself!
Tip: Wait til baby is in a good mood with a full tummy.
Milk Bath Photo Results
Here are some of our favorite shots. What do you think? Would you try taking your own milk bath photos?


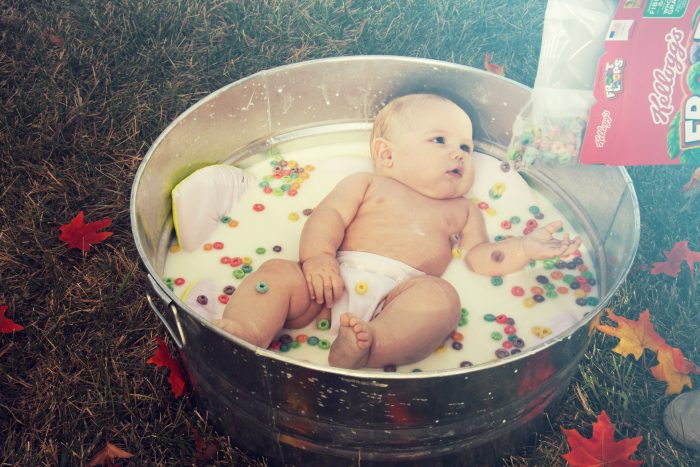
He really wanted his first solid food to be Fruit Loops
About the Author
Julia joined Cotton Babies in 2016 as Executive Assistant to Jenn Labit. She’s the proud mama to a toddler and a baby. She and her husband also have 2 dogs, a cat, a turtle and a pet fish. Julia is a diehard Cardinals fan who loves spending time with her family, shopping, crafting, and binge-watching “The Office.”


Comments
Comments are closed here.